Essential Techniques for Accurate Cell Counting in the Lab - Pricella
Source: PricellaPublished: 2025-01-02
Cell counting is a common procedure in laboratories used to determine the number of cells in a sample and assess whether the cell quantity meets experimental requirements. In this session, we have compiled some commonly used counting methods: manual cell counting, automated cell counters, and microscopy-based density estimations for both suspension and adherent cells at varying densities. This guide aims to help you quickly get started with your experiments.
1. Manual Cell Counting Method
Steps:
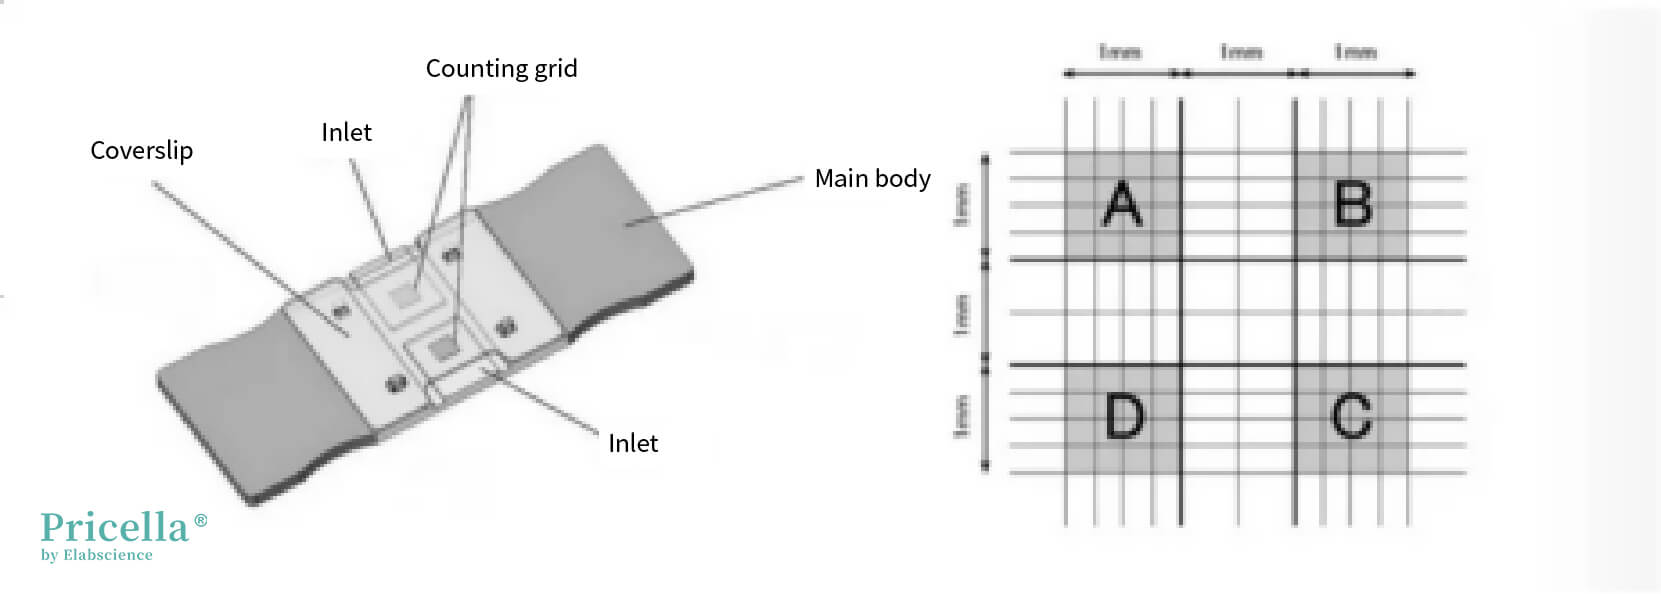
1) Clean the hemocytometer and coverslip thoroughly, then place the coverslip over the hemocytometer.
2) Use a pipette to mix the cell suspension until homogenized. Aspirate 10–20 μL of the suspension and apply it to the edge of the coverslip, allowing the cell suspension to fill the space between the hemocytometer and coverslip.
3) Let the cells settle for 1–2 minutes. Ensure no air bubbles are present under the coverslip, and avoid letting the suspension overflow into adjacent channels.
4) Count the cells under a microscope within the four large squares (A, B, C, D). Only count cells touching two of the grid lines (e.g., left and top lines). If two cells form a cluster, count them as individual cells. If clusters constitute about 10% of the total count, it indicates poor dispersion, which may lead to inaccurate results. In such cases, prepare the suspension again. When the cell count is high, consider using a cell counter.
5) Calculate the cell concentration using the formula:
Cells/mL = (Total cell count in four large squares) × 10⁴ / 4.
(Each large square contains 16 smaller squares).
2. Automated Cell Counting Method
Automated cell counting is performed using devices such as blood cell counters or microscopic image analysis system. These instruments automatically identify and count cells, improving accuracy and efficiency.
Steps:
1) Clean the hemocytometer and coverslip thoroughly, then place the coverslip over the hemocytometer.
2) Use a pipette to mix the cell suspension until homogenized. Aspirate a small amount of the suspension and apply it to the edge of the coverslip, allowing it to fill the space between the hemocytometer and coverslip.
3) Let the cells settle for 1–2 minutes. Ensure no air bubbles are present under the coverslip, and avoid letting the suspension overflow into adjacent channels.
4) Place the hemocytometer in the device, set the required parameters, and the instrument will automatically count the cells.3. Estimating Cell Density Using Microscopic Observations
In some cell culture processes, when precise cell counts are not required, or counting facilities are unavailable, visual estimation under a microscope can be used to assess whether cells are ready for subculture based on their density. Below are density references for both suspension and adherent cells, commonly observed under a microscope. Note that cell density values can vary with cell size; the examples provided are for common cell types.
1) Reference Densities for Adherent Cells Under the Microscope
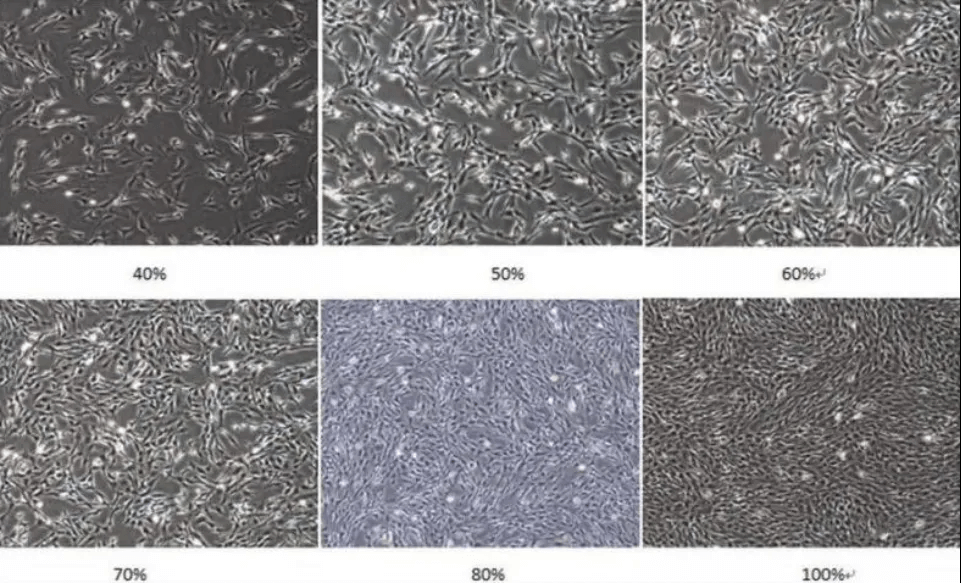
Images showing adherent cells at different densities (The image is sourced from the internet)
1) Reference Densities for Suspension Cells
After seeding suspension cells into a T25 culture flask, allow them to settle for 3-5 minutes under the microscope before capturing images.
Note: Suspension cells tend to gather towards the center due to movement, leading to uneven density distribution.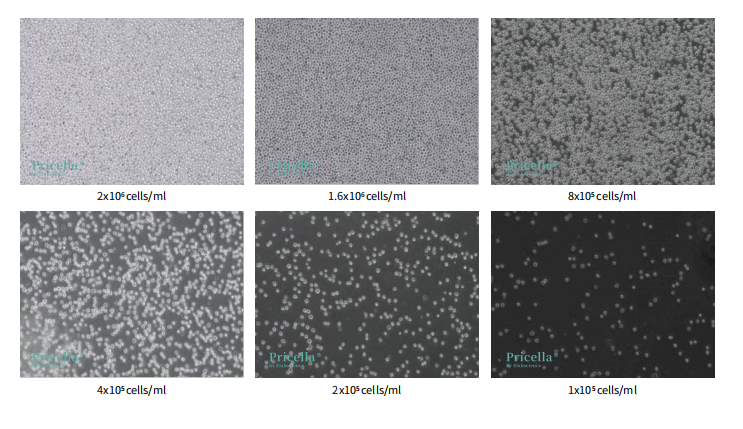

Prev: Classification and Selection Criteria for Cytokine Products
Next: Comprehensive Overview of Astrocyte Knowledge - Pricella